
Has your wood floor lost its beauty due to the scratches and the dirt? You don’t need to get it repaired but sand it once. Sanding removes the scratches, gives the floor an even finish, and also makes it look new again. How to sand your own wood floors in Singapore?
Many people ask this question as they don’t want to pay the high fees professionals charge to do this work. Luckily, it’s something you can do yourself without needing any professional help. Read this post and let us teach you how to sand your own wood floors. PS Home Maintenance Singapore expert in floor installation, carpentry services, and ceiling repair services in Singapore.
Benefits of Sanding Wood Floors
There are many benefits of sanding wood floors that include:
- Your floors start to look almost brand new again
- It gets rid of those annoying scratches and marks
- The wood actually lasts longer when it’s taken care of
- Makes it easier to apply any polish or finish evenly
- A nice-looking floor can seriously boost your home’s value
- Everything feels cleaner and more put together
- You won’t need to replace the whole floor anytime soon
- Day-to-day cleaning becomes way less of a hassle
- It brings out the wood’s natural charm and warmth
How to Sand Your Own Wood Floors in Singapore?
Sanding your own wood floors is definitely possible. You just need to follow this expert guide step by step, and you’ll be able to sand your floors without any professional help.
Clear the Room
Move everything out of the room. Furniture, rugs, plants, all of it. The floor should be completely bare. Look for nails or staples sticking up from the boards. Hammer them down or pull them out so they don’t damage your sander.
Then sweep or vacuum the entire floor. No dust, no crumbs, nothing. You want a clean surface before starting anything.
Rent the Right Equipment
Go rent a floor sander and an edge sander. You’ll need coarse, medium, and fine sandpaper to go with it. Grab a dust mask, ear protection, and safety goggles while you’re at it. Ask the staff how to use the machines if you’re not familiar.
Make sure they work before you bring them home. Nothing worse than renting a faulty sander halfway through a job.
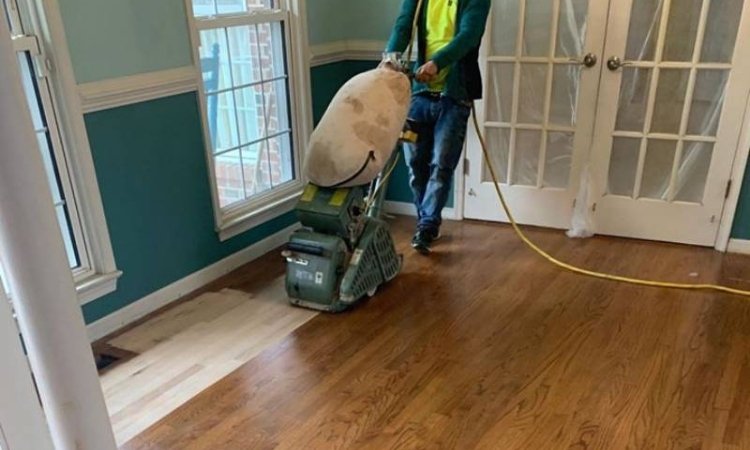
Start With Coarse Grit
Start sanding with coarse grit sandpaper. This removes the old finish and scratches. Make sure you keep the machine moving in straight lines. Don’t stop in one spot for too long, as it could gouge the floor.
Keep doing it till you’ve covered the whole area. When you’ve done the whole area, it’s now time to vacuum it. Remove all the dust and the leftovers using the vacuum.
Sand the Edges
The big sander can’t reach the corners or edges. Use your edge sander for that. Stick with the same coarse grit paper you used before. Work slowly and keep your movements even so it blends in with the rest of the floor.
Once you’re finished with the edges, vacuum again. You’ll be doing a lot of vacuuming through this process, so keep it close by.
Move to Medium Grit
Now switch to medium grit sandpaper. This smooths out the rough texture left by the coarse sanding. Use the same method as before, steady movements with the grain. Do the entire floor and then follow up with the edge sander again using the same grit.
When it all looks even, vacuum everything one more time. Don’t leave any dust behind before moving on.
Finish With Fine Grit
When you get to the last pass, make sure you use fine grit sandpaper. Why? Because it makes the surface smooth and ready for a clean, even finish. Keep sanding along the grain and make sure you don’t miss any spots.
Finish the edges again with the same grit so everything matches. Once it feels smooth to the touch, vacuum every inch of the floor. Then wipe it down with a clean dry cloth.
Clean the Floor Properly
When you’re done sanding, get the vacuum and start cleaning the floor, removing all the dust and dirt. Go over the edges carefully.
Then use a dry or slightly damp cloth to wipe everything down. Let it dry fully. One speck of leftover dust and your finish could end up looking blotchy or rough.
Apply Finish or Stain
Choose a finish or stain that looks good to you. Nothing complicated. Use a brush or roller and go in the same direction as the wood.
Let it dry all the way before doing another coat. If it feels a bit rough, give it a quick light sand and wipe off the dust. Two coats work fine but three will make it look better. Take your time and do it right.
Final Words
How to sand your own wood floors in Singapore? Clear the room and check for nails, rent a floor and edge sander with the right sandpaper. Start sanding with coarse grit to remove the old finish and use the edge sander for corners and tight spots.
Switch to medium grit for smoother results and sand the edges again to keep everything even. Finish with fine grit for a clean surface, vacuum, and wipe the floor well. Apply your stain or finish, let it dry, then repeat if needed.