In Singapore, it does not have to be difficult to install window tints. Window tint helps to block heat from the sun. It also gives more privacy at home. In Singapore, many people use window tinting because of the hot weather. It is easy to install window tint by yourself. You do not need special tools. You only need a few things and a bit of care. This guide will help you install window tint step by step at home.
How to Install Window Tints at Home?
Installing window tints is easy if you follow the right process and keep useful tools with you. PS Home Maintenance Singapore is an expert service provider in new window tint installation in Singapore. Moreover, their other window tinting & removal services, door repair, false ceiling installation, and flooring installation services stand out in the competitive market of Singapore.
Step 1: Buy the Right Window Tint
Go to a hardware shop or a home store, and choose a good window tint that blocks heat and light. Some tints are dark while others are light. Pick the one as per your choice. Make sure it is safe to use at home.
Step 2: Prepare Your Tools to Install Window Tints
You need only a few tools. Here is the list:
- Spray bottle with water and a few drops of dish soap
- A clean cloth
- A cutter or sharp blade
- A squeegee or a plastic card
- A ruler
Step 3: Clean the Window
Use water and soap to clean the window, and wipe it with a clean cloth. Make sure there is no dust. Also, check for marks and old glue. The window must be very clean. Any dirt will make bubbles in the tint.
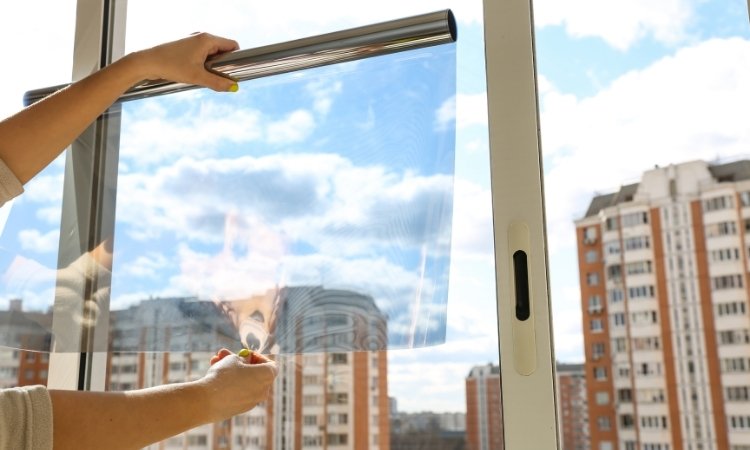
Step 4: Measure and Cut the Tint
Take your ruler and measure the window. Cut the tint film slightly larger than the window’s size. Later, you will trim the edges. Do not peel off the back film yet to ensure a proper installation.
Step 5: Wet the Window
Spray water with soap on the glass and do not dry it. The water will help move the tint into place. Spray the whole window until it is wet.
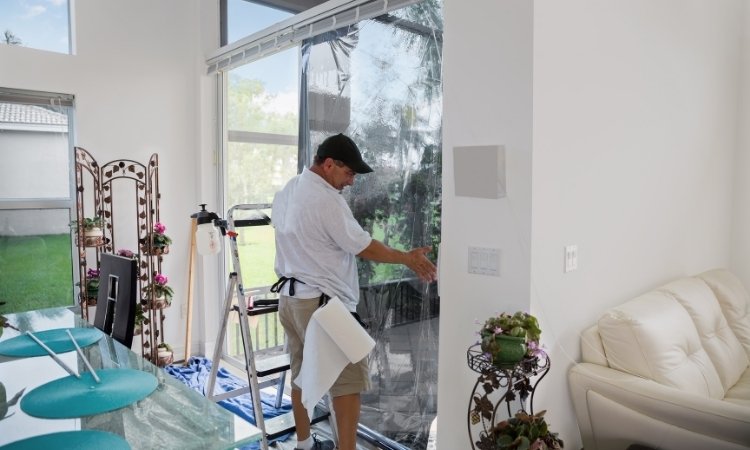
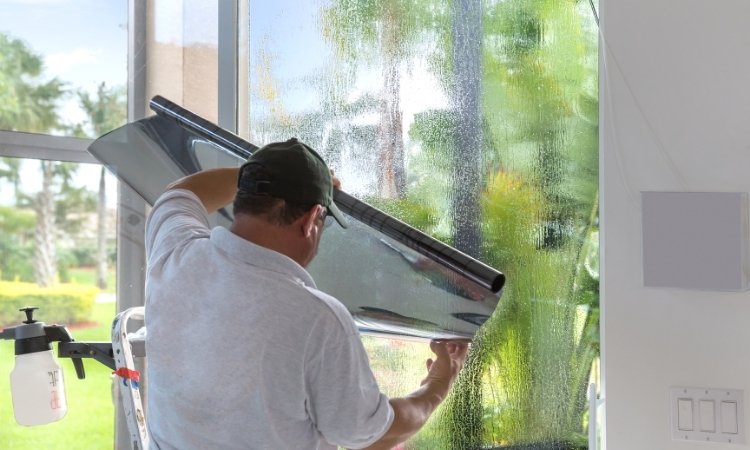
Step 6: Peel and Place the Tint
Slowly peel off the backing film from the tint. Be careful while doing this step; it may spoil if the tint sticks to itself. Hold both sides and place the tint on the wet window. Start from the top, and let it rest slowly down to the bottom.
Step 7: Smooth the Tint
Use a squeegee or a plastic card to push the water and air out from the middle to the edge. Work gently to remove all bubbles. Do not press too hard, or it may tear the tint. Keep doing this until the tint sticks flat to the glass.
Step 8: Trim the Extra Film
Use your blade or cutter to trim the extra film. Cut along the edge of the window, and work slowly. Make clean cuts to ensure the tint fits well.
Step 9: Let It Dry
Do not touch the tint for a few days. Let it dry on its own. If you see small bubbles, they will go away. Keep the window closed during this time.
Step 10: Clean the Tint
After three to four days, clean the tint with a soft cloth. Do not use strong cleaners. Just a bit of water is enough. Do not scrub, and keep the tint smooth and clean.
Safety Tips
Be careful when you use a blade. Keep tools away from kids. Also, check if your window is smooth. If there are cracks, fix them first. Take your time to do it well.
When to Ask for Help?
If the tint is very large, you may need help. Ask a family member to hold one side. Also, if your hands shake or your eyes are unclear, get help from someone.
Conclusion
It is a smart way to install window tint, block heat, and get more privacy in your home. You can do it yourself with simple tools. Follow each step one by one. Doing it yourself is easy and useful. Now, you can enjoy a cooler home in sunny Singapore.