
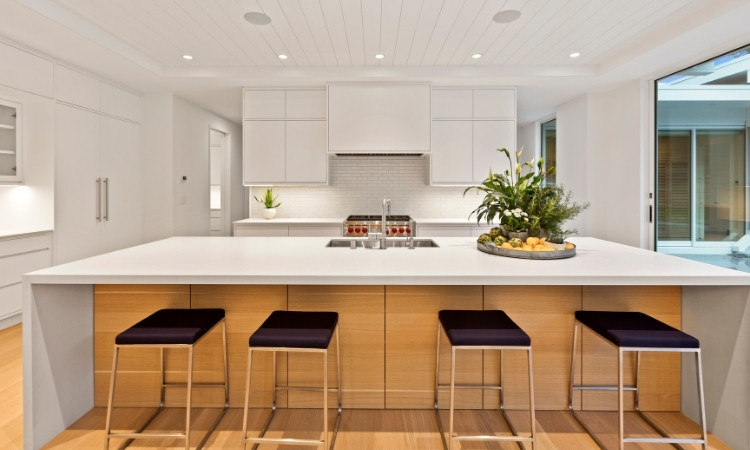
It is a rising idea to install recessed lighting in Singapore. Recessed lighting improves the brightness and style of any home. It creates a clean and modern look. It also saves space, which is often a concern in Singapore. Many homeowners in Singapore prefer recessed lighting for its beautiful design and even light distribution.
The installation process needs proper planning and careful execution. This guide provides a step-by-step method to install recessed lighting with simple tools and minimal effort.
How to Install Recessed Lighting in Singapore?
Installing recessed lighting has become a popular choice among homeowners in Singapore. Recessed lighting installation is simple and easy if you follow the right process. PS Home Maintenance Singapore explains the complete process to install recessed lights in Singapore.
Moreover, they offer installing recessed lighting in Singapore at the most affordable cost. Furthermore, their lighting installation, exhaust fan installation, and aircon installation and repair services stand out among their competitors.
Step 1: Choose the Right Recessed Lights
Select recessed lights based on the ceiling type and room size. LED lights last longer and consume less power. Halogen lights produce a warm glow, but they use more energy. The size of the light fixture matters. Small fixtures are better for compact spaces.
On the other hand, larger ones are suitable for bigger rooms. Consider the beam angle and brightness level. Some lights have dimming features for adjustable lighting. Waterproof recessed lights are ideal for bathrooms and kitchens. Choose fixtures that blend well with the existing decor. This will make a unified indoor look.
Step 2: Gather Tools and Materials
Before starting, prepare the tools. You will need the following tools and materials:
- Measuring tape
- Pencil for marking
- Hole saw
- Screwdriver
- Electrical tester
- Wire strippers
- Electrical tape
- Recessed light kit
- Ladder
- Safety gloves
Step 3: Plan the Light Placement
Measure the ceiling space and mark the spots for each light. Keep an equal distance between the fixtures for balanced illumination. Avoid placing lights too close to walls. Also, ensure enough spacing to prevent shadows. Moreover, ceiling obstructions like beams and air ducts should be considered.
Check the existing wiring to avoid cutting into live cables. If installing multiple lights, align them in a straight line or a pattern that suits the room layout. Proper planning prevents mistakes and saves time.
Step 4: Cut the Ceiling Openings
Use a hole saw to cut openings at the marked spots. Hold the saw steady to avoid rough edges. Clean the edges to ensure a neat finish. Wear safety goggles to prevent dust from entering the eyes. If the ceiling has insulation, push it aside to create space for the light fixture. A clean cut ensures easy installation.
Step 5: Install the Wiring
Turn off the main power supply before handling the wires. Use an electrical tester to confirm that no current is running in the circuit. Run wires through the ceiling to connect the fixtures. Strip the wire ends and join them using wire connectors. Insulate the connections with electrical tape.
Use cable clips to hold and organize the cables. If you feel unsure about wiring, consult PS Home Maintenance Singapore for their efficient services. Proper wiring ensures safety and prevents electrical faults.
Step 6: Attach the Light Fixtures
Insert the recessed light fixture into the ceiling hole. Properly connect it with the provided clips and screws. Connect the wires to the fixture terminals. Push the fixture into place until it sits perfectly with the ceiling. Some fixtures have spring-loaded clips that hold them in position. Ensure a perfect fit to prevent movement. A well-fitted fixture enhances the room’s appearance.
Step 7: Install Recessed Lighting
Choose the right bulbs for the fixture. LED bulbs provide energy efficiency and long lifespan. Insert the bulb into the socket and twist it gently to mount it inside the holder. If you use dimmable bulbs, check their compatibility with the light switch. Avoid touching the bulb surface with bare hands to prevent damage. A firm installation ensures optimal performance.
Step 8: Restore Power and Test the Lights
Switch on the main power supply. Turn on the light switch to check if the lights work. If any fixtures work, check the wiring connections. A loose wire can cause a malfunction. Adjust the fixture position if necessary. Ensure all lights function properly before completing the installation.
Step 9: Final Adjustments and Cleanup
Adjust the light angles if necessary. Clean the ceiling surface to remove dust and debris. Dispose of excess wiring and packaging materials. Inspect the fixtures for stability. A final check ensures a neat and professional finish.
Conclusion
In conclusion, install recessed lighting in your home to enhance its look and efficiency. The above steps ensure a smooth installation. Safety is key when handling electrical components. A well-installed recessed light improves illumination and adds elegance to the space. Regular maintenance keeps the lights in good condition. With the proper steps, anyone can achieve a well-lit and modern home.