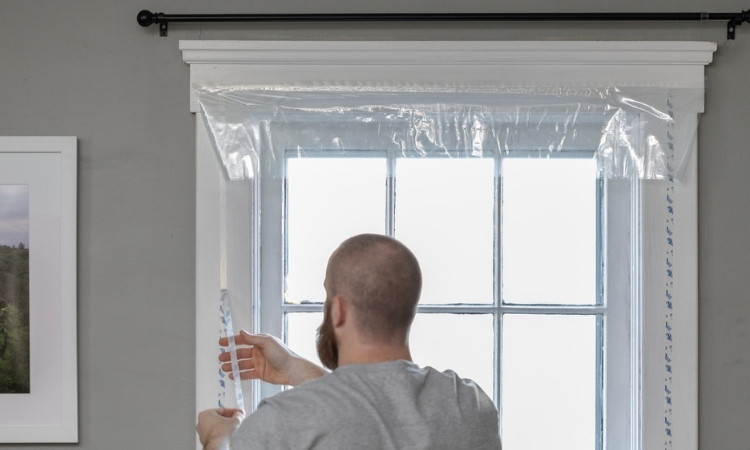
Wondering how to keep your home cool and energy-efficient in Singapore’s tropical climate? Learning how to Install A Window Insulation Kit is a simple and cost-effective way to achieve this. Singapore’s hot and humid weather, combined with frequent rain, makes window insulation a smart choice for homeowners.
A window insulation kit can be used to block heat, minimize energy costs, and protect your household from moisture. This article explains the step-by-step procedure of Installing A Window Insulation Kit, specific to the Singaporean climate and housing requirements, such as HDB and private housing residential units.
Why Install A Window Insulation Kit in Singapore?
Singapore’s heat and humidity can make homes feel stuffy, increasing the air conditioning costs. A window insulation kit acts as a barrier that blocks heat, maintains a cooler environment inside, and leads to less energy usage. Installing a Window Insulation Kit will make you more comfortable, save on energy bills, and prevent UV damage to furniture as well.
These kits are cheap, simple to install, and ideal for DIY fans. Also, PS Home Maintenance Singapore is an expert in window repair, partition wall installation, and window tinting & removal services in Singapore.
Tools and Materials Needed
Before you start the Window Insulation Kit Installation, gather these items:
- Window insulation kit (plastic film and double-sided tape)
- Measuring tape
- Scissors or utility knife
- Hair dryer
- Clean cloth
- Isopropyl alcohol or residue-free cleaner
- Step stool (for tall windows)
How to Install A Window Insulation Kit: Step-by-Step Process
Step 1: Measure Your Windows
Measure first the windows you would like to insulate. With a measuring tape, find the height and the width of every window in inches along the outer edge of the frame. The majority of kits include a large piece of plastic that you can cut down to fit in several windows. Increase each dimension by 8-10 cm so that the film wraps around the rim of the frame with a bit to spare.
Step 2: Clean the Window and Frame
A clean surface is key for Installing A Window Insulation Kit. Dust, grease, or moisture can weaken the tape’s adhesion. Wipe the window glass, frame, and sill with a damp cloth. For greasy spots, use isopropyl alcohol or a residue-free cleaner like methylated spirits.
Let everything dry completely. In Singapore’s humid climate, avoid installing on rainy days, as moisture can collect on window frames, especially metal ones. If you have blinds, lift or remove them to keep them out of the way.
Step 3: Apply Double-Sided Tape
Take the double-sided tape from your kit and apply it around the window frame. Place it on the front of the molding, about 2 cm from the edge, to keep it neat and protected. Work top to sides, and then bottom. Use scissors to cut the tape to have clean ends.
You need to overlap the tape a little at the corners to seal it tightly. And fix it in place by pressing hard on it with a clean cloth. When the tape is not sticking well, clean the frame again to get rid of any grease or moisture.
Step 4: Prepare the Insulation Film
Unpack the plastic film carefully, as it’s thin and can tear easily. Lay it on a clean, dust-free surface to avoid dirt sticking to it. Measure and cut the film to match your window’s dimensions, including the extra 8-10 cm you added earlier.
If you’re insulating multiple windows, cut one sheet at a time to avoid waste. In Singapore’s HDB flats, where windows can be tall or narrow, ensure the film is large enough to cover the entire frame.
Step 5: Attach the Film to the Tape
Now, it’s time to Install A Window Insulation Film. Start at the top of the window. Peel back about 6 inches of the tape’s backing at the top and press the film onto it. Work from one side to the other, keeping the film taut but not stretched tight. Peel the backing off the side tapes gradually, smoothing the film as you go.
If you get wrinkles, don’t worry, they’ll disappear later. Once the sides are done, peel the bottom tape’s backing and attach the film, pushing it slightly inward to ensure it sticks well at the corners.
Step 6: Shrink the Film
Shrink the film with the help of a hair dryer and press out wrinkles. Set it to a medium or high heat setting and hold it 8-10 cm away from the film. Move the dryer in a circular motion, starting at the edges and working toward the center.
The heat will tighten the film, making it clear and smooth. Be careful not to hold the dryer too close, as it could burn the plastic. In Singapore’s warm climate, this step is quick, but ensures the room is well-ventilated to avoid overheating.
Step 7: Trim Excess Film
After shrinking, trim any excess film using a utility knife or scissors. Cut carefully, about 2-3 mm from the tape’s edge, to avoid pulling the film off. Hold the knife parallel to the frame and trim smoothly to prevent tearing. The small excess will curl slightly when heated and won’t be noticeable. Clean the window area afterward to remove any dust or tape residue.
Conclusion
The tropical Singapore climate can be harsh on your wallet and home. Install A Window Insulation Kit in Singapore to stay cool and keep the heat out. It is an easy, low-cost, and efficient DIY project that applies to both HDB and privately owned houses. Get a kit, and begin Installing A Window Insulation Kit today and have a cooler and more energy-efficient home.


