It is simple to install drywall ceiling in Singapore if you follow the right procedure and have the tools at hand. A drywall ceiling gives your room a neat look. It hides wires and pipes. It also dampens the sounds. Many homes in Singapore now use drywall ceilings. You can install it with the right tools and steps. This guide will show how to install a drywall ceiling in a simple way.
How to Install Drywall Ceiling in Singapore?
Installing a drywall ceiling is a doable DIY task that only requires a few essential tools and attention to detail. PS Home Maintenance Singapore explains the complete procedure of drywall ceiling installation in Singapore. Moreover, their ceiling repair, waterproofing, and flooring installation services in Singapore. Let’s explore the process to hang drywall ceilings in Singapore.
Step 1: Get the Tools and Materials
First, you need the correct tools. You need a drill, screws, tape measure, ladder, and a cutting knife. You also need drywall boards and metal frames. Get safety gear too for your own protection. Wear gloves and goggles to keep your eyes and hands safe. Always make sure the tools are safe to use to ensure better results.
Step 2: Measure the Ceiling Area
Use tape to measure the ceiling. Write down the length and width. This will help you determine how many drywall boards you need. Measure the space twice to avoid mistakes. Mark the points on the wall with a pencil. They will act as guides for your further work.
Step 3: Fix the Metal Frame
The metal frame holds the drywall. Fix it to the ceiling with screws. Use a drill to make holes. Then put the screws into the holes. Furthermore, ensure the frame is balanced to make it feasible for ceiling. You can use a level tool to check. The frame must be strong and tight.
Step 4: Cut the Drywall Boards
Drywall boards come in large sizes. You need to cut them to fit your ceiling. Use a cutting knife for this purpose. Place the board on a flat surface and mark the size you need. Cut along the line with the knife. It is important to avoid rushing through the process.
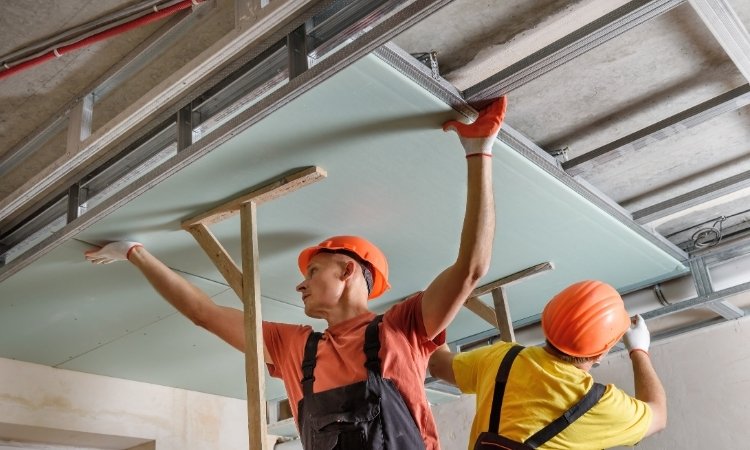
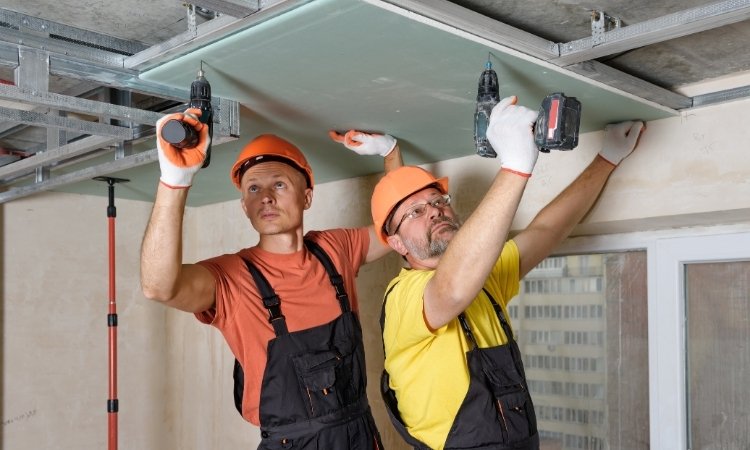
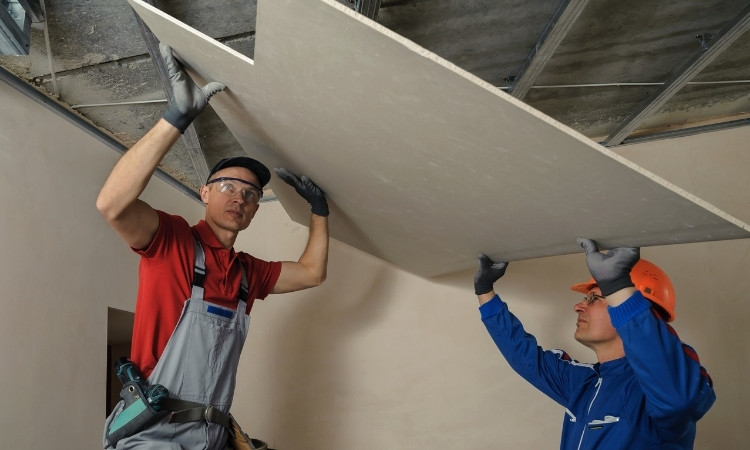
Step 5: Fix the Drywall to the Frame
Lift the drywall board with care. Ask someone to help if it is too heavy. Place the board against the metal frame and use screws to fix it. Put screws every 12 inches and do not leave any gap. Repeat the step until the whole ceiling is covered. This step will ensure that there is no missing spot left.
Step 6: Seal the Gaps Between Boards
After fixing the boards, there will be small gaps. Use joint tape to cover the gaps. Press the tape hard so it sticks well. Then apply joint compound over the tape. Spread it flat with a putty knife. Let it dry fully before the next step to ensure it has done its work efficiently.
Step 7: Sand the Surface
When the joint compound is dry, it will feel rough. Use sandpaper to make it smooth. Do the sanding process carefully to avoid damaging the ceiling. Do not press too hard, as the surface can get damaged in this process. Clean the dust with a dry cloth. Now the ceiling is flat and clean, and it is ready to be painted.
Step 8: Paint the Ceiling
The last step is painting. Choose a good ceiling paint and use appropriate painting tools to paint the ceiling. It is essential to select meaningful colors that complement the interior design. Apply two coats for a better look. Let the first coat dry before you apply the second
Conclusion
In conclusion, if you follow the above steps, it is easy to install drywall ceilings in Singapore. Installing a drywall ceiling in Singapore is not hard if you follow the steps. You need the right tools and a little care. A new ceiling can make your home look fresh and clean. If the task feels too hard, you can call a skilled worker to help.