
In contemporary homes, bathroom exhaust fan installation ensures a comfortable and healthy living environment. The bathroom is a critical area where planned ventilation is essential among the various spaces in a house. If not adequately addressed, excess humidity and unwanted odors can result in issues such as mold growth and degradation of indoor air quality. Installing a bathroom exhaust fan is a practical solution to eliminate these concerns.
This comprehensive article provides a step-by-step approach to installing a bathroom exhaust fan through a do-it-yourself (DIY) method. DIY emphasizes precision, safety, and ease of execution, but it requires much attention.
Bathroom Exhaust Fan Installation Instructions
It is not easy to install a bathroom exhaust fan; however, these instructions or details will be extremely helpful.
Material, Tools, and the Process
Gathering the necessary materials and tools before jumping onto the bathroom exhaust fan installation journey ensures a seamless process. The fundamental items required include a bathroom exhaust fan kit, vent hose, exterior vent cap, screws, electrical cable, cable connectors, duct tape, screwdriver, drill, wire stripper, and a voltage tester. Having these components readily available will streamline the bathroom exhaust fan installation process.
Step 1: Choose the Right Location
The first step is to select an appropriate location for the bathroom exhaust fan. The fan should be positioned near the shower or bathtub to eliminate excess moisture. Furthermore, it is essential to consider accessibility to power sources and an external wall for efficient venting. By carefully choosing the installation location, you lay the foundation for optimal performance and effectiveness of the exhaust fan. Visit our SERVICES PAGE for bathroom exhaust fan installation in Singapore.
Step 2: Turn Off Power
Whenever you start working on an appliance connected to the electricity, you must turn the power supply off to begin. Safety is the key when dealing with electrical installations. Before starting any work, turn off the power supply to the bathroom. To ensure that the power is off, use a voltage tester. This preventive measure safeguards against potential electrical hazards during the installation process.
Step 3: Mark the Installation Area
Precision is critical when you start to install a bathroom exhaust fan. Installing a bathroom exhaust fan and using the template provided with the fan kit is instrumental in achieving the required accuracy. The template is a guide for marking the installation area on the bathroom ceiling. This template ensures the opening is appropriately sized, resulting in an aesthetically pleasing and seamlessly connected exhaust fan. You can visit our home page for more information on new bathroom exhaust fan installation in Singapore.
Step 4: Cut the Opening
When you locate the suitable position, the next step involves cutting the opening in the ceiling. This process demands careful execution to avoid damage to existing electrical or plumbing components. The marked area can be accurately cut using a jigsaw or reciprocating saw, preparing the space for the other installation steps.
Step 5: Mount the Fan Housing
Once you mark and make the slot for the fan, the fan housing can be securely mounted to the ceiling joists using screws. Ensuring the housing is level and tightly secured is crucial to prevent vibrations and noise during the fan’s operation. A stable and secure housing guarantees the longevity and effective performance of the bathroom exhaust fan.
Step 6: Connect Wiring
Going through the electrical aspect of the bathroom exhaust fan installation requires careful attention to detail. Following the manufacturer’s instructions, connect the fan’s electrical wiring to the corresponding wires in the ceiling. You can use wire connectors to establish secure and reliable connections. If uncertainties arise during this process, consulting with an electrician is advisable to ensure proper coherence with safety standards.
Step 7: Install the Ductwork
Efficient venting is an essential part of the functionality of a bathroom exhaust fan and, hence, the installation process. Connect the vent hose to the exhaust port on the fan and secure it with duct tape to prevent air leaks. Afterward, running the ductwork to the house’s exterior completes this step, ensuring a clear and direct path for air to escape.
Step 8: Install Exterior Vent Cap
Saving the exterior of the venting system is essential for preventing pests and weather elements from entering. Attaching the exterior vent cap to the end of the ductwork ensures a safe and durable barrier. This component not only enhances the lifespan of the exhaust fan system but also improves its overall efficiency.
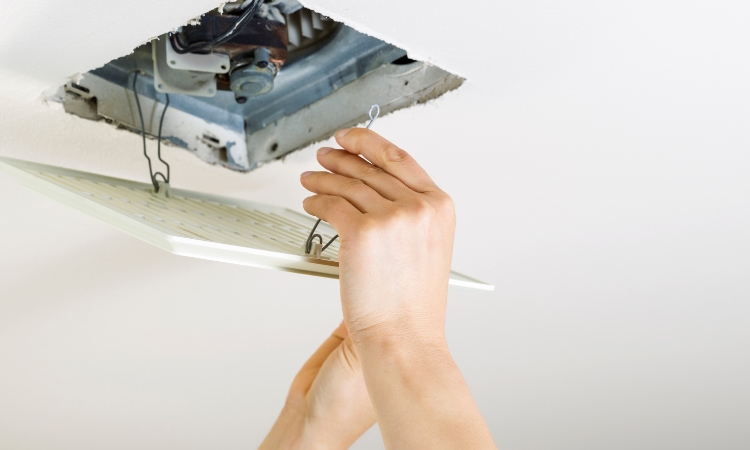
Step 9: Secure the Grille
The fan grille serves both a functional and aesthetic purpose. Securing it to the fan housing finishes the installation with a polished look and prevents external objects from entering the fan and ductwork. This final step ensures the exhaust fan operates smoothly and efficiently.
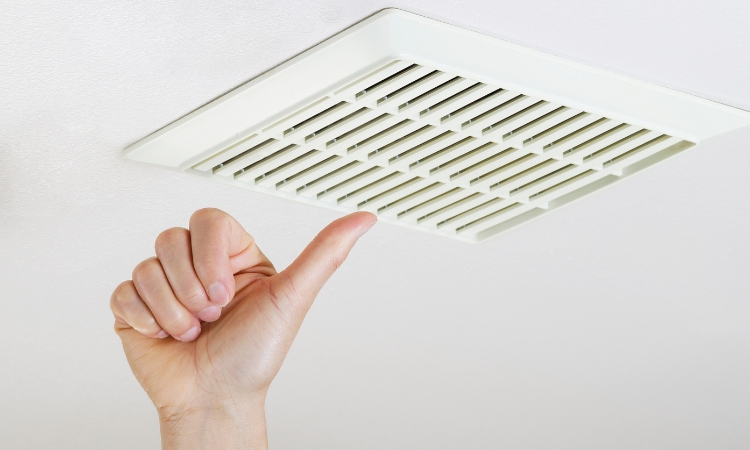
Step 10: Test the Fan
With the installation completed, the next important step is to test the bathroom exhaust fan. Restoring power and activating the fan allows for assessing its proper operation. Inspecting for effective air removal and ensuring quiet operation are critical elements in verifying the success of the installation. Any issues during this testing phase may require a review of the wiring and connections.
Conclusion
Bathroom exhaust fan installation through a DIY approach is a practical and achievable process that significantly improves a home’s overall functionality and comfort. By following the outlined steps and sticking to safety guidelines, you can enhance the ventilation of your bathrooms, making a healthier living environment. Regular maintenance, including cleaning the fan and ductwork, further ensures the sustained optimal performance of the exhaust fan. This comprehensive guide helps homeowners with the knowledge and confidence to do this essential home improvement project.