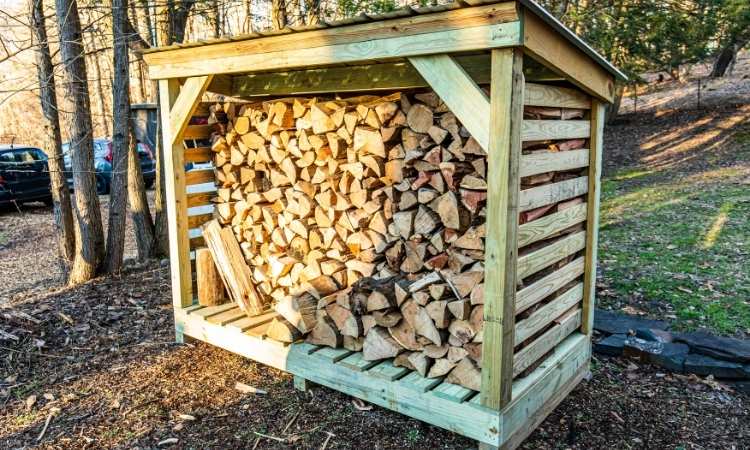
Have you ever found it difficult to keep your firewood dry and neat during the rainy season in Singapore? Learning how to build a Firewood Rack is the perfect solution to keep your firewood neatly stored, protected from moisture, and ready for cozy evenings. In Singapore’s humid climate, a well-built firewood rack ensures your wood stays dry, prevents mold, and makes your outdoor space look tidy.
Whether you’re a seasoned DIYer or a beginner, this guide will take you through the steps to build a Firewood Rack in Singapore that’s sturdy, affordable, and tailored to your needs. Also, PS Home Maintenance Singapore is an expert in power tripped, carpentry services, and waterproofing services in Singapore.
Why You Need a Firewood Rack in Singapore
Singapore’s tropical climate brings heavy rain and high humidity, which can ruin unprotected firewood. Wet wood burns poorly, produces more smoke, and can attract pests. A firewood rack keeps your logs off the ground, allows air circulation, and protects them from rain with a simple cover.
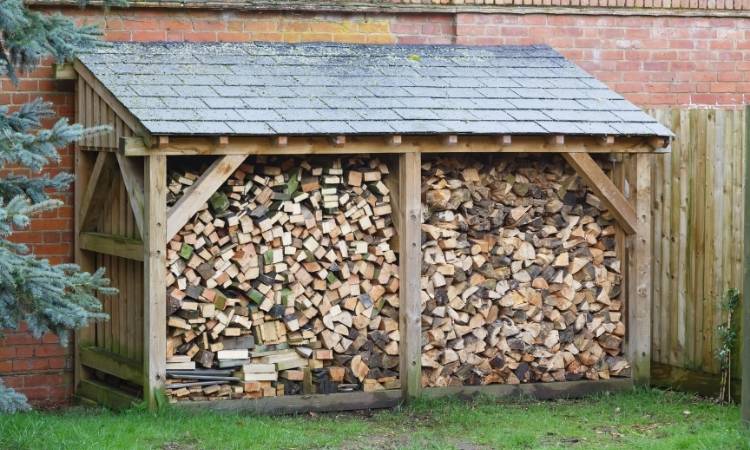
Firewood Rack building is another way to save space and have a rustic look in your garden or patio. And it’s also a fun DIY project that can be completed over a weekend!
Materials You’ll Need to Build a Firewood Rack
Before you start building a Firewood Rack, gather these materials. Most are available at hardware stores like Home-Fix, Horme Hardware, or online platforms like Lazada and Shopee in Singapore.
- Lumber: Four 2x4s (8 feet long) for the frame and two 2x2s (4 feet long) for cross-braces.
- Concrete Blocks: Four blocks to elevate the rack.
- Screws: 3-inch wood screws (at least 16) and 2.5-inch deck screws (8).
- Tools: A saw, drill, measuring tape, level, screwdriver, and pencil.
- Optional Cover: A waterproof tarp or corrugated metal sheet to protect from rain.
- Paint or Sealant: Weather-resistant paint or wood sealant for durability.
Total cost? Approximately between S$50 and S$100, according to your choice of material.

Step-by-Step Guide to Building a Firewood Rack
Follow these simple steps to Setup a Firewood Rack that’s sturdy and functional.
Step 1: Choose the Perfect Location
Pick a flat, stable spot in your garden or backyard. Avoid low-lying areas where water collects. A spot near your home makes it easy to grab firewood, but ensure it’s not too close to prevent pest issues. Check that the area gets good airflow to keep the wood dry.
Step 2: Prepare the Base
Place the four concrete blocks on the ground to form a rectangle. For a standard rack (4 feet long and 2 feet deep), space the blocks about 3.5 feet apart lengthwise and 1.5 feet apart widthwise. Use a level to ensure they’re even. This elevates the rack, preventing moisture from seeping into the wood.
Step 3: Cut the Lumber
Measure and cut your 2x4s to size. You’ll need:
- Two 4-foot-long pieces for the base.
- Two 3.5-foot-long pieces for the top supports.
- Four 2-foot-long pieces for the vertical supports.
- Two 2x2s cut to 4 feet for diagonal braces.
Use a saw and double-check measurements for accuracy. Finish rough edges by sanding them down.
Step 4: Assemble the Frame
Place the two 4-foot 2x4s on the concrete blocks forming the foundation. Place 3-inch screws on the blocks where they need to be secured. Fasten the four 2-foot vertical supports to the ends of the base pieces with 3-inch screws. Next, attach the two 2x4s measuring 3.5 feet to the top of the two vertical supports to create the top frame. Check that everything is square with a level.
Step 5: Add Diagonal Braces
To ensure that your rack is solid, you should attach the 2×2 diagonal braces. Install them on the sides, extending between the lower edge of one vertical support and the upper edge of the other support. Fasten with 2.5-inch deck screws. This would ensure that the rack does not rattle when it is loaded with wood.
Step 6: Apply Weather Protection
The weather in Singapore requires additional protection. Apply paint or sealant that is weather-resistant to all wooden surfaces. This will save against rot and prolong the life of the rack. Allow to dry and then stack firewood.
Step 7: Add a Cover
You should then wrap your rack with a waterproof tarp or steeply sloping sheet of corrugated metal to protect your firewood against the rain. Strap the cover down using bungee cords or weights, providing airflow so that mold does not grow. Avoid fully enclosing the rack, as ventilation is key.
Step 8: Stack Your Firewood
Now, stack your firewood neatly. On the bottom layer, place larger logs and top them with smaller ones to stabilize them. Keep the stack below the top frame to avoid overloading. Check that air can circulate around the logs to keep them dry.
Benefits of Building Your Own Firewood Rack
By building a Firewood Rack, you save money compared to buying a pre-made one, which can cost S$150 or more. You also get to customize the size and design to fit your space. It is also a fulfilling project that improves your DIY capabilities and makes your outdoor space more attractive.
Conclusion
Building a Firewood Rack is a practical and rewarding project for any Singapore homeowner who loves a cozy fire. A weather-proof, sturdy rack that will keep your firewood dry and organized can be constructed with simple materials, basic tools, and only a couple of hours.
Stick to the instructions provided, prevent the most typical errors, and have a functional backyard without clutter. Your homemade firewood rack will bring convenience to your life and beauty to your house, regardless of whether it is a barbecue or a cold evening. So take out your gear and build a Firewood Rack now!